Friday, March 24, 2023

How to patch bad flooring (mobile home leaky toilet edition)


We’ve all been there, haven’t we? We start out on a project that we’ve been procrastinating on, and just as the project is almost complete, it gets bigger. That’s actually been the whole experience remodeling our 1981 Doublewide. I’m talking, scenes straight out of Money Pit. So, it wouldn’t seem right if plumbing went seamless for me. In this case, the last room to plumb is the main bathroom and low and behold, there is a leak from the toilet inlet valve and around the bowl itself. Gross. If you also have floor repairs to make, or more specifically, toilet flooring repairs to tackle, maybe this will help you get started. Have fun!

Tooling and materials

T square

Safety stuff (ear muffs, goggles)

Measuring tape

Pencil

SkillSaw

Vibratool

Hammer and nails

Screwdriver and screws

Plywood (same thickness as your original flooring)

2x6 (or whatever size joists you have)

Speed square

Chop saw (recommended but you can use skill saw) 

The first thing you will want to do is get an idea of how large the area is that you will need to remove and replace. I chose to first frame up the spot for the new subfloor and then I found more water damage as I actually cut into it. I don’t love having an unsupported hole in the floor but if you can avoid putting weight on it, maybe it would help to first remove the rot. You will want to make this either a square or rectangle shape as it is very difficult to frame up circles and triangles…

 In the first photo you might notice the screws I have dangling down. This was an easy way for me to mark where I would be cutting underneath so I could double check that there was no more damage on the outside of my border. This also gives me points to draw my line for my supports and it’s a lot easier to measure from this point to the other parts of my frame.


Make sure you check that each piece of wood is square. It helps me to get it in place, screw the board a couple of times to hold it there, then nail in the board. You want to use nails as they are stronger for this application. Screws can shear apart of they are side-loaded.


 You want your new flooring to go half over your new supports. You will have parallel joists that run under your floor and each new piece of subfloor will span halfway over the joist thickness so that you have support under each joining piece. If you are not replacing a whole sheet of plywood, you will probably have to build more supports around the joists. You will notice I have the long light colored floor joists running and I attached 4 pieces of wood to the joists going perpendicular. I then finished the frame with 2 pieces of wood running parallel with the joists.


From the top side, it’s easier to see the basic frame shape. We have half or a little more of the thickness of the frame exposed where we will screw down our new board.


 Next step for me was cutting the square hole in the floor. I used my square to lay it out and draw a rectangle. I could not use my skill saw the whole time because the wall was in the way so I had to use my vibratool to finish up. 

 Next, we will be making our plywood patch. First, you want to measure the thickness of your original subflooring. (I wanted to get it a little closer than before since the wood was swollen and I had to read it at an angle. Make sure you don’t include the thickness of the finish flooring on top.


Next, take your plywood and your T-square. I start by making sure my corner that I am going to be cutting from is square.


Once I have an established square corner, measure off of one side and mark it in a few places. Next, line up your T-square with your marks. The T-square will secure to the top of your plywood if your plywood is square. Draw a line all the way down. (You might want to leave a 1/16" to a 1/8" gap in each direction by cutting both sides a little short. If not, you may have to make some adjustments to the hole and/or beat the wood in with a hammer.)


Measure and mark your next dimension perpendicular to the first line. You will want to extend both of these lines extra-long as the skill saw blade is only cut through once half of it is through the end of the wood.


Next set your depth. With the skillsaw unplugged, adjust the nut and set your blade depth. Easiest to do this with the blade on the end of the plywood and the guard lifted up. Once it’s set, make sure to tighten the nut and ensure it didn’t move.


Start your saw with the blade in line to contact the wood. It helps to pull the guard up to get started and once the full blade is in the plywood, the guard will stay out of the way. Make sure to watch the line from the top. Cut until your blade is at least halfway through the end of your desired line. Otherwise it will not cut all the way through the wood.


Next, flip and do the other line.

Fit the patch in the hole. If you don’t give yourself a gap, you will likely have to fine-tune the fit with the vibratool. For some reason, I never give myself much of a gap.


Once your plywood looks like it should fit, it may not drop in perfectly.

I usually beat it in from here with a hammer once it looks right. 😅


Out with the old, in with the new!

Next step is to secure it down. For this, I used screws. I screwed in each corner and the midpoint around the perimeter of each corner.


If the floor patch is all you had to do, it is done (except putting new finish flooring on top but that’s a later date for me.)

If you are also patching up your toilet hole and plumbing, this instructional is coming soon!


Friday, March 10, 2023

How to THOROUGHLY research land without ever stepping foot there


So, you want to look at land…

Usually for me the first step is Zillow, or a similar MLS site.


If you have looked for bare property before, you probably already know. You rarely ever get a “real” address. It will say something like “0000 example road exampleton, WA 98000” or as below. This is because usually unimproved land does not have an address assigned yet. Most agents will lead you to the road it’s on or will be on once an address is assigned. Still, it can be a challenge to find and research from this.


Sometimes you get really lucky and they include a parcel number for you


In any case, the next part is pretty similar.

With either a road name and the acreage, or best case scenario, a parcel number, it is possible to find more information on this land. Go to the county tax parcel website. Type in your google search bar “______ county tax parcel search”


Once you find it, open the site, and find the search bar on the county site. Type in the road name or parcel number if you have it. Some sites will not help you out with automatic road name options and expect you to know what you’re looking for. Hard to do with a partial address. A trick I have found with these sites is you can use the % sign before the road name to conduct a “wild card” search. This will give you a list of all addresses on that road. Of course you are looking for an address that doesn’t exist yet so you will have to click on a random address, click on map, and search around the area that way. You may find the agent misspelled the road name so if it does not come up right away, try other spellings. We’re all human here.


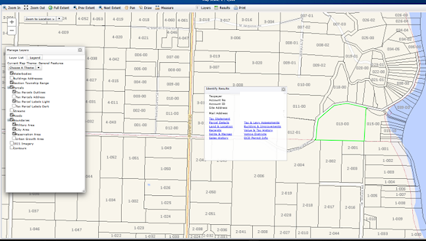
The next part is the hard, tedious part. You will see a map with all the parcels there. If you are looking for a standard 5.0 acre parcel it may be hard to find. But most parcels are not exact whole numbers and this is very helpful in narrowing down your search. Also, the property here has a distinct bend to it which helps. Sometimes I just have to click on one, see how much acreage it has, and either look for larger or smaller parcels based on that. (I told you this part was tedious). Once again. If you can, get the parcel number from the listing or call the listing agent and ask.


But, if you find yourself with a particularly difficult listing and an agent that insists you have your agent talk to them or sign a contract.. you may need to know this information. I’ve been there. Any of those red boxes there are parcels with addresses on this road. Reminder that you are looking for something that does not have an address so I’d start with the larger chunks that are not red.

In any case, I picked one here for size comparison. I am looking for 8ish acres on this road. My next step is to click on Land and Location link


Here’s where that lead. Now I know to look for parcels about 4 times the size


Ok, skipping ahead. I used the approximate size and features of the land such as that very round corner along the road and found the parcel. But I made sure to check that the land matched up with the parcel size I was looking for and it all checks out. No situs address, same sweeping corner, same distance from the water, and same parcel size. In my case, same parcel number too. If you are so lucky to have that information


Now, the fun part begins. I highly recommend looking at the following before wasting your time hunting down a piece of land in person. Geology, water, critical areas, zoning, elevation. Also good to know and public information is when and for how much the land was last sold. This applies to homes, too. Now, things change obviously. If they bought after the 08 crash and before the climb, you are not likely to negotiate that much with them. But sometimes you find they just bought the property, have made no improvements as per the county records, and are asking 6 times what they paid. Sometimes, and not always, if it is listed a while and this is the case they may negotiate a bit. Or it may just turn you off from the deal completely. Either way, more information, right? There are also some good links to check out under details. It is also possible to find out is how much taxes are on this land, and if the tax payments are up to date. If taxes are late, this may be more of a motivated seller than the listing leads on.


Water Critical areas “Whaat R critical areas.”

Anyways… You want to see what kind of rivers, streams, and wetlands are on the land. In this particular PNW area, this is usually my first task. We have water all over and you can’t build a house over wetlands. Sometimes the whole property is a wetland, making it basically impossible to use for anything more than a place to visit and go for walks. (If that) This particular chunk of land has a stream of water that literally borders the whole property. Already it is unlikely you are going to be able to punch in a road without a little bridge and if it’s a stream with salmon, it’s a huge headache if even possible at all. This is great to know before you visit and fall in love with the scenery. If you are still interested in the land, this could be a potential bargaining opportunity knowing this information.
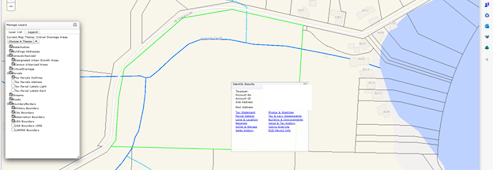


Ok, the following photo also shows “potential wetlands” meaning the area around the stream is probably a bit swampy and the county may come in and decide that its wetland. Maybe right after you buy it. Making that whole green area unbuildable.


The next thing to look into is Zoning. For many this maybe the first thig to look at, for me it’s the second as most 5 plus acre parcels are RR and you can typically build 1 house on these which is what I’ve looked for in the past. Ok, so to figure out zoning, on your layer list theme here, I’m going to click on zoning


Awesome, right? Hehe.. OK, so the green with the giant “RR” is not for railroad. It means “rural residential.” And it basically means you can put up to one house per 5 acres typically. How do I know? That handy dandy legend there on the side. You will see things like “1 DU per 5 ac” which means “1 Dwelling Unit per 5 acres” or you can see “1 DU per 10 ac” which would not work in this case since it is less than 10 acres. Good stuff to know.


Next thing I typically look at is if this land is a cliff, ravine, etc. It’s not always easy to build a house on land that resembles a rollercoaster. So from my layer list, I’m going to click on the general features theme and make sure I click on “Contours”


Now from the legend on the side I can see what the lines represent. Gives me some idea of how hilly it is.

Ok, there is also the option of seeing what kind of utilities are nearby. Not sure if this was available when I was property searching but here you can see there are a couple culverts nearby. Nothing else popped up. There are neighbors with houses though so utilities are probably close, at least power. Water and septic are often not available on bare larger parcels of land. If they are, some info is probably on the county records section.


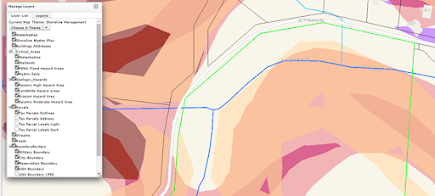
Next is Geological hazards area. Yikes. I noticed that the legend for this was not quite right so I removed some of the hazard categories to see what was what. This is all of them together. It appears that the orange is seismic high hazard area


The red just under the orange appears to be Landslide hazard area.


And the purple is Erosion Hazard areas


If all of that is not enough to scare you off and you want to go see this place in person… you can use the map measuring option to draw lines along the road and figure out how far it is from a landmark, the nearest house, etc.


Last but not least, Play around with the site. There are so many things you can find out about land on these county sites and its nice to have an idea of what you are getting yourself into before writing your first offer.


Wednesday, March 8, 2023

Why you should hire a public adjuster if you have a homeowner insurance claim

As an avid DIYer, a public adjuster is one professional I would highly recommend if you ever need one. Read why.


When our house burned down November of 2015 (Read our story here), we had a lot to think about. One of our neighbors came by and gave us a card to a public adjuster they had used to deal with their house fire claim. We also had other “fire truck chasers” show up and tell us they were public adjusters and could help us with our house fire claim. If you think that the insurance company is going to work in your best interests financially.. you can rethink that. No doubt the agent you are talking to is going to genuinely want to do the best job they can for you. But the policy that the insurance company writes to remain a for-profit business is fairly iron-clad. Plus, it is a huge pain dealing with your living arrangements right after you lose them unexpectedly along with probably, all of your belongings. Dealing with the insurance’s annoying policies is the LAST thing you would want to sign up for. A public adjuster works for you for a fee, to deal with the insurance company. They will fight to get you as much as you are owed, they know more about this than I ever did, and they typically run things like hiring an inventory specialist.


Commission VS standard rate. We dealt with 2 different adjusters and the one we went with had a good point. If you agree to pay a standard rate to deal with your claim, there is not built-in incentive to get you as much as possible. The agent that works on commission will work harder, naturally. I believe we paid 10%. Let me tell you how that worked out for us.

I was under the impression that our house claim would be 240k as that is what we paid for the house. Reading the contract, it was insured for 240K. Anyone could read that and make that assumption. But for the structure alone, our public assessor got us 330K. How? They know what they are doing. They already paid for themselves and then some. One of the points I remember is that there are all sorts of codes that did not exist when the house was built. There is a secret pot of money the insurance needs to pay you to bring the house up to code. But average Joe who just lost everything and has other priorities may not know that or find that information and may settle for a straight 240k and live with less house than they had due to unforeseen costs and think that the insurance company had their back 100%.

They negotiated for us so we could live on our property while the process occurred. Our mortgage was 1400 with taxes, insurance (so glad to have that), and our mortgage. They found out that to rent a comparable home of this size, on this much land, or hire someone to watch our livestock while we rented and renting furniture would cost around 3,500 a month. Initially, the insurance company was only going to pay the minimum monthly for the first 12 months on a trailer payment. Were talking hundreds a month, not thousands. Luckily we knew someone who would rent us their RV indefinitely and accepted 3,000 for the first 12 months and nothing after. It took 18 months to build our house, we were glad for that arrangement.
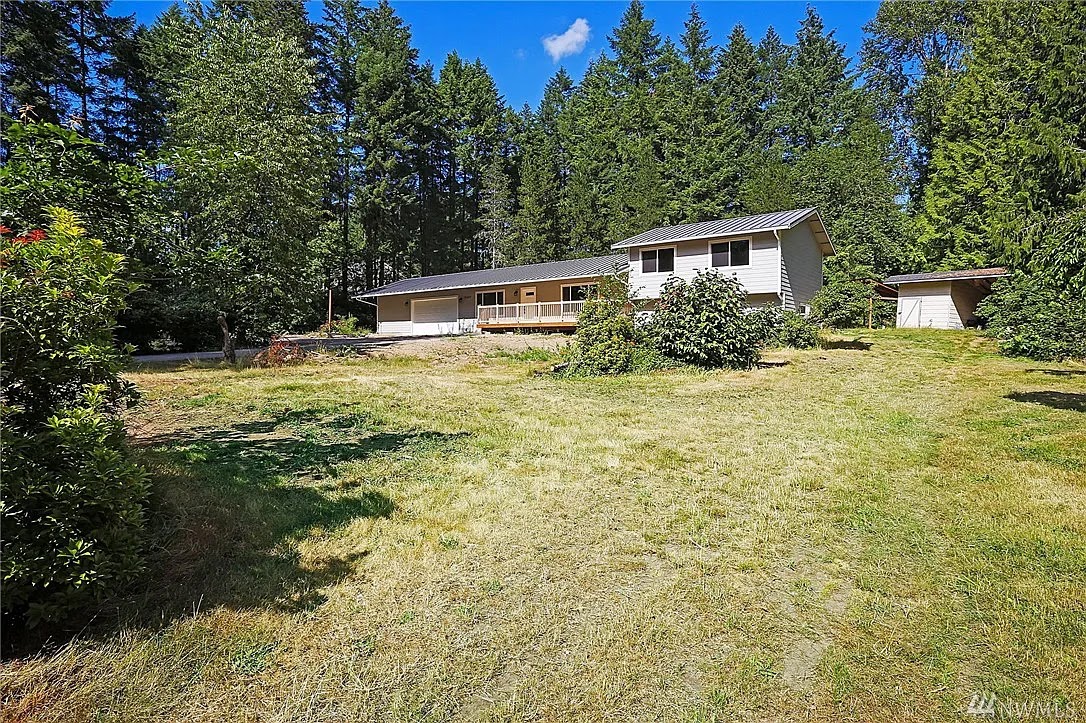
We got some upgrades. Such as a new metal roof, which was much better than the 3 tab we had before. We got air conditioning that we didn’t have before. We got a hookup for the RV we stayed in on the property. I doubt we would have been able to request that without the assessor. We added a bathroom and a bedroom. We fixed the goofy layout. How? I’m really not sure. But they made it happen. We almost had to buy part of the roofing ourselves due to some error in communication but we instead chose not to put a wood stove back in as that was something we could do ourselves and there was already a furnace. We did have a 2.5 story chimney before that we didn’t put back in which saved a lot of money we were able to use in other places. The public assessor with the contractor was able to help us know what money could be moved without having us owe. We ended up building a really nice house in the end.


They cut the B**sh**. To start, as soon as our insurance company was told we hired a public adjuster, they switched our agent to one that is used to dealing with public adjusters. I thought this was a little funny but then I learned that the adjuster probably knows a lot more than the average agent such as specific laws in your state that give you more than the insurance agency is nationally required. For example, in the state of Washington, you actually get 3 years to make new claims against an existing claim like “I forgot we had priceless paintings that burnt up in the fire” up to 3 years later. The insurance company will typically only give you the national 1 year timeframe. And why would you think any different? Unless you have an adjuster to tell you otherwise. Another thing is there was this weird policy that we had to purchase our contents and return the receipts to get the other half of our money back. Our adjuster was able to waive this rule. The only thing we missed out by not doing this was the money paid in sales tax. Luckily we knew we had 3 years to turn it in. Funny thing though, you don’t always want all of your same stuff back. Plus if we were able to get it on sale the second time around, it made more sense not to turn that in.

They hired the inventory specialist. An inventory specialist is a Godsend. They go through your house, pick up everything, research how much it costs, and write it all up. Not only would that be horribly depressing to do post house-fire, it takes a lot of time and you are exposing yourself to a lot of toxins just being in the house after the fire. This was part of their 10%, they did not charge extra for this. If you don’t hire an adjuster, I’d at least recommend hiring someone to take care of your inventory. We got around 100,000 from this. If I had done it, I’d probably have quit after we had enough money back to buy some clothes again.

They hired the contractors. We didn’t have to find a contractor to do the work. The public adjuster already has a general contractor in the area who is used to dealing with house fires and restoration and hires our all the subcontractors. Now, I do have a negative here as it seemed like not everyone was on the same page. We’d go days and weeks watching nothing being done. But since then we’ve come to realize that is a common practice in the field of contractors. Yay..

We got good deals on some really nice appliances, cabinets, flooring, other building materials because of their connections. We had to drive an hour or so to go to their place but we were getting contractor pricing, not homeowner pricing. They held our hand through the process of picking out all the tile, cabinets, etc. My husband and I actually had a lot of fun with this part of the process.


It did take longer I believe, to reach an agreement. Our adjuster was relentless in getting us more money to adequately replace our home, find us a place to live, and replace what we lost. The first 4 months were awful. It did get dragged out a bit. But in the end, I would highly recommend hiring a public adjuster if you ever have an incident with your house. They did a great job.


How to safely Pressure Can

  Goals of today's blog lesson   1.) State the main safety concerns of canning and how to mitigate risks.   2.) Find and research the ...